
A Tumble-tious Love affair: How to do Handstand
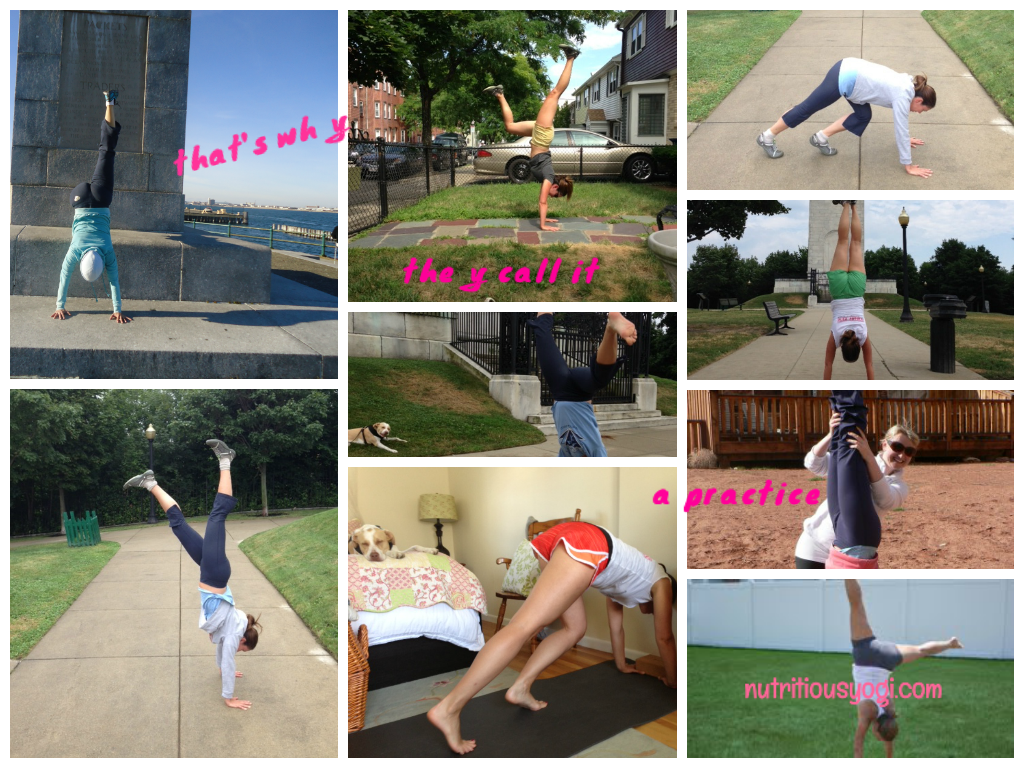
Yoga: That's why they call it a practice. Stretching and strengthening your body in the right areas will help you get closer and closer to going upside down. With handstand, so much of it is fear based.
Phew! Talk about practicing yoga on and off the mat. Inversion poses are a total metaphor for life. Going upside down can trigger so many different fears you didn’t even knew you had. Fear of the unknown, fear of falling, fear of ..."is my shirt going to fall down?" Too much to think about. The first thing I always do when I’m anxious about a pose is to admit, “yes, this is kinda scary”, and be okay with it. Getting out of our comfort zone is what helps us grow, and for me there’s no better way than a handstand.
Let’s try heading into the pose slowly. Back off at any point your body says it’s had enough.
Great warm up moves
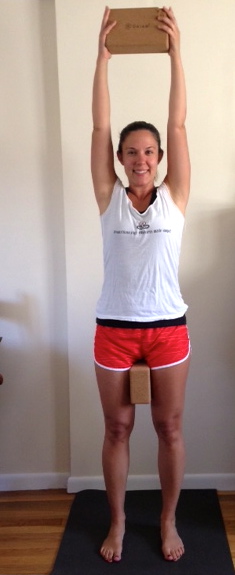
Blocks in between hands and thighs to activate the right muscles (see picture below) I have my students do this at the beginning of class if we’re working on handstand. This fires up the muscles and prepares the body for what’s to come.
Hands on either side of block up against wall. This is another way to activate the correct muscles. It reminds us to draw the arms together instead of apart.
How to do handstand at the wall
Begin in downward facing dog facing the wall., leaving a few inch space between your hands and and the wall. Be sure to clear all obstacles such as pictures and hanging decorations. (do not underestimate your capacity for destruction)
Squeeze the upper, outer arms together and lift the heels to lengthen the body. Keep the collar bones spread wide as you pull the belly in, and begin to fire up those inner thigh muscles.
Keep the left leg bent, as the right leg leads you up. ( or whichever leg is more comfortable to lead with) You may find you have to try a few times, but you will get there. Here are some pointers:
Biggest mistakes I made for a long time
1. Relying too much on the wall. If you rely too much on the wall, then that’s the direction your body wants to fall once you try it in the middle of the room, and it’s best to fall the opposite way (for obvious reasons). If you choose to try this pose without the wall, remember you can cartwheel out of it at anytime but do what feels comfortable for you. (Trust me, I’ve done more cartwheels than I can count,) but soon, your body will feel more comfortable with the position and you’ll start catching some air!
2. Keeping the shoulders behind the wrists instead of directly above the wrists. Once I started aligning my shoulders it made a huge difference. If you kick up from a down dog you’ll have too much momentum and easily overshoot the pose. Focus more on alignment and the squeezing in of the arms and legs, and that’s what will send you up.

Willie doesn't look impressed.
3 Kicking up instead of lifting. another way to surely overshoot the pose is when you focus on momentum instead of simply lifting up into the pose. Pay attention to your points of contact (the hands) and press them firmly into the ground instead.
4. Bending the arms. yea don't do that.
PS. WANT MORE WELLNESS INSPIRATION? BE SURE TO SIGN UP FOR MY MONTHLY NEWSLETTER. GET IT HERE!